
Relationship Manager
Tell PersivX how the objects in your workspace relate, so it can build accurate joins and aggregations during analysis.
Before building any report, make sure PersivX knows about the relationships between the different files, tables, and objects in your workspace.
ℹ️ Relationships Can Be Defined at Two Levels
Global level affects all tiles and charts using the datasource. Chart level affects only one specific chart — an advanced topic, covered separately.
Opening the Global Relationship Manager
- Click the link icon 🔗 in the top-right corner of the datasource box.
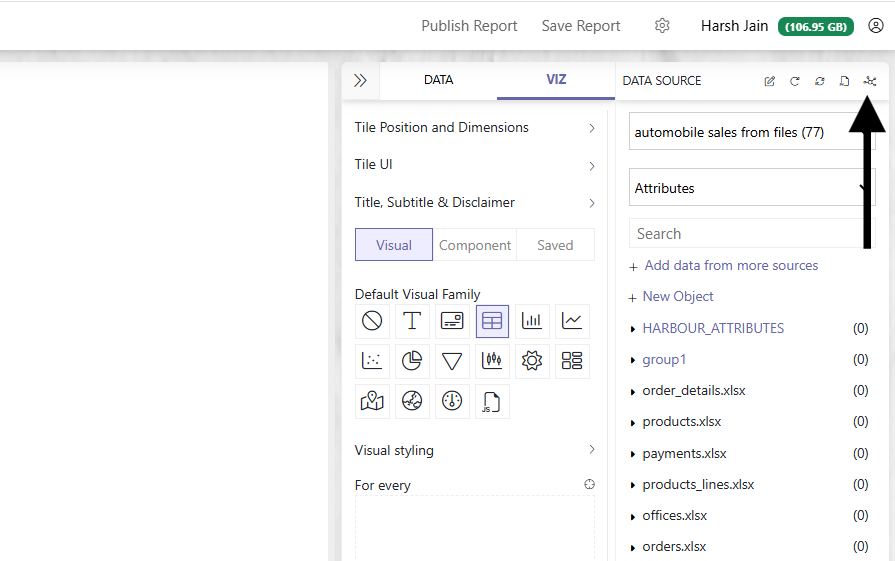
- The Global Level Relationship Manager opens immediately.
The Two Sections of the Window
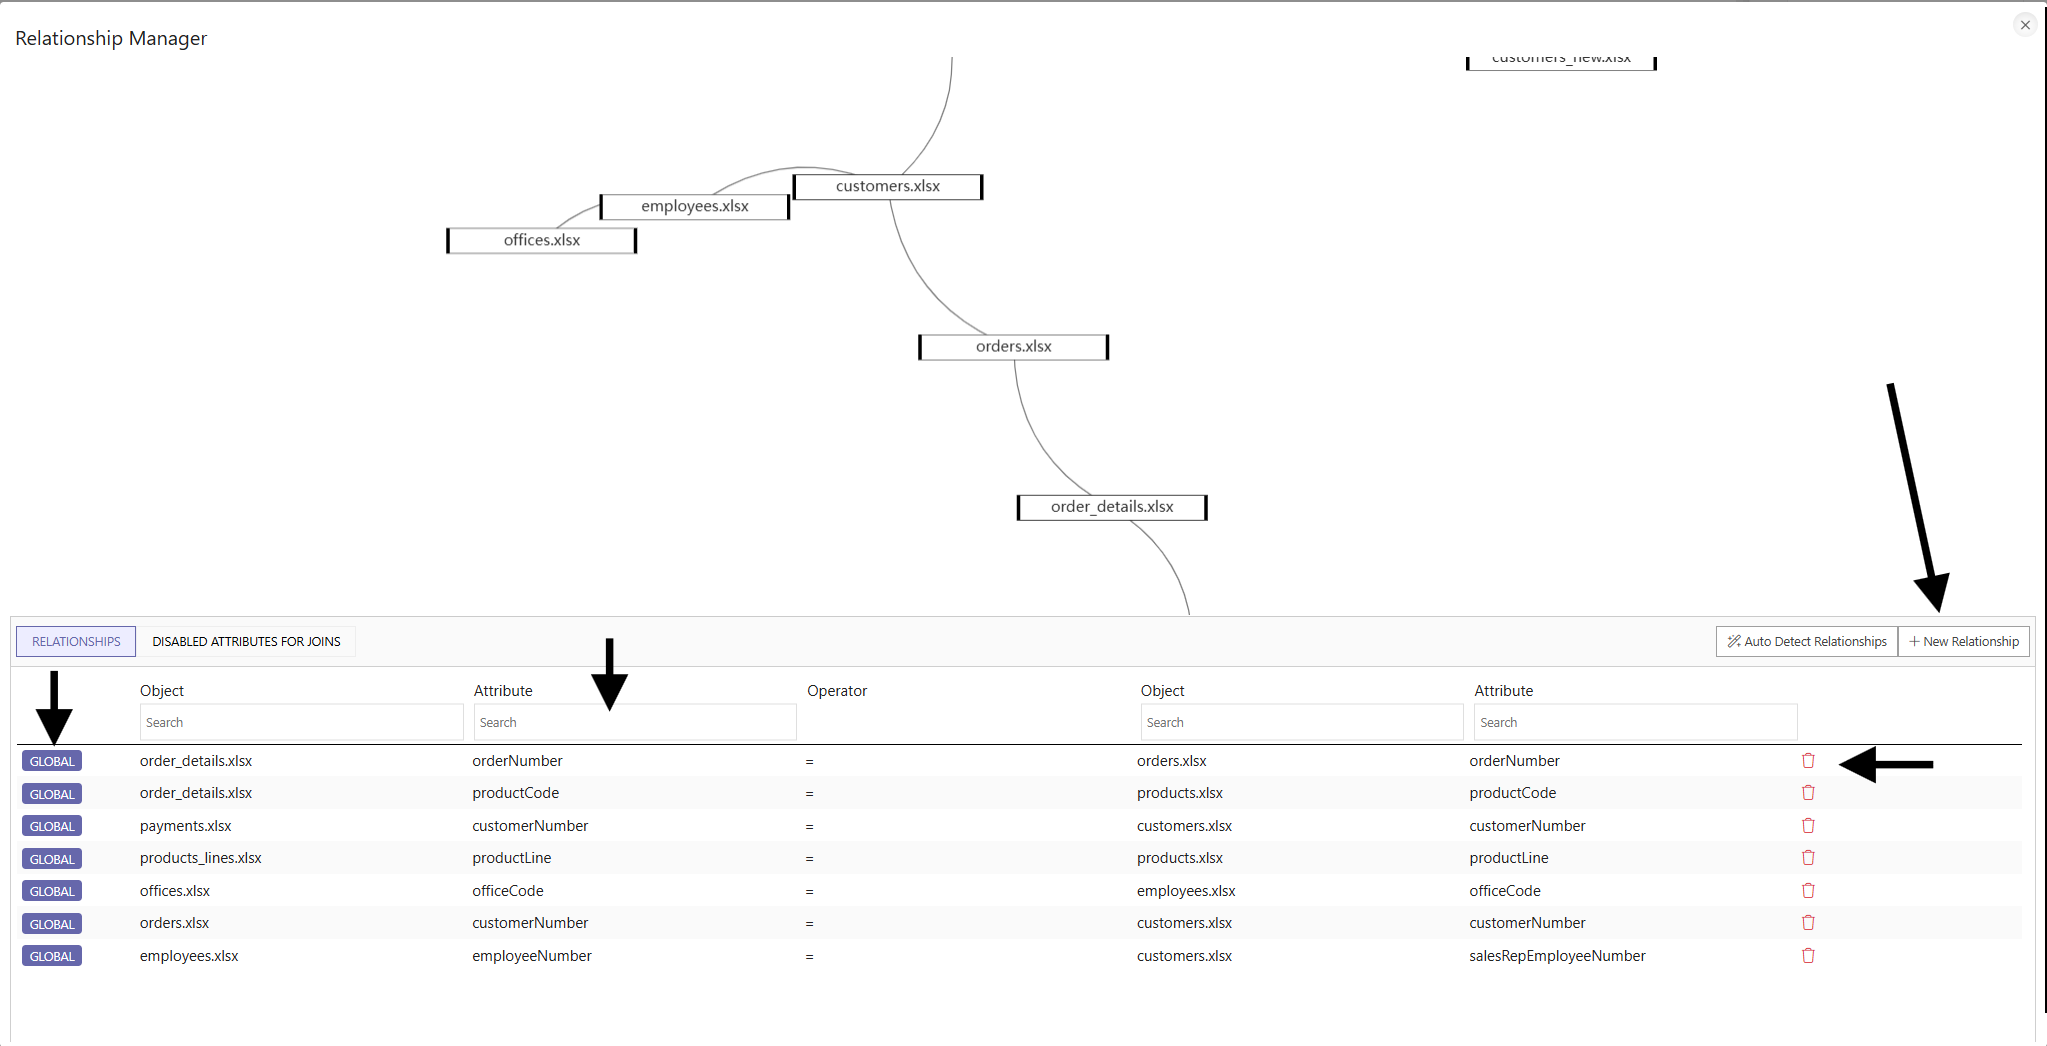
1. Visual Relationship Diagram
- Displays a graph of all data objects (for example
orders.xlsx,products.xlsx) - Shows how those objects are linked together
- Makes orphaned tables and incorrect linkages easy to spot
2. Relationship Table
The bottom pane lists every active relationship:
| Object (Left) | Attribute | Operator | Object (Right) | Attribute |
|---|---|---|---|---|
order_details.xlsx | orderNumber | = | orders.xlsx | orderNumber |
payments.xlsx | customerNumber | = | customers.xlsx | customerNumber |
employees.xlsx | employeeNumber | = | customers.xlsx | salesRepEmployeeNumber |
Each row carries a badge indicating where the join came from:
| Badge | Meaning |
|---|---|
| Global | Custom-defined in PersivX, applying globally across all dashboards and charts. |
| Chart | Custom-defined in PersivX, applying only to the current chart. |
| No badge | The join already existed in the datasource as a foreign key. It applies across all dashboards and charts. |
Actions You Can Take
ℹ️ Your Database Is Never Modified
When connected to a database, updates made in the Relationship Manager do not affect the datasource. They stay at the PersivX level, guiding the engine on how to build the query for an analysis.
- 🔄 Auto Detect Relationships — let PersivX identify potential joins from matching column names and data patterns.
- ➕ New Relationship — manually define a join by selecting source and target objects, the matching attributes, and an operator (currently only
=is supported). - 🗑️ Trash icon — disable or remove a relationship.
- 👁️ Enabled icon — for live datasources only, use this to ignore or use a pre-existing foreign key relationship from the source.
Adding a New Relationship
Define new relationships manually with the + New Relationship option.
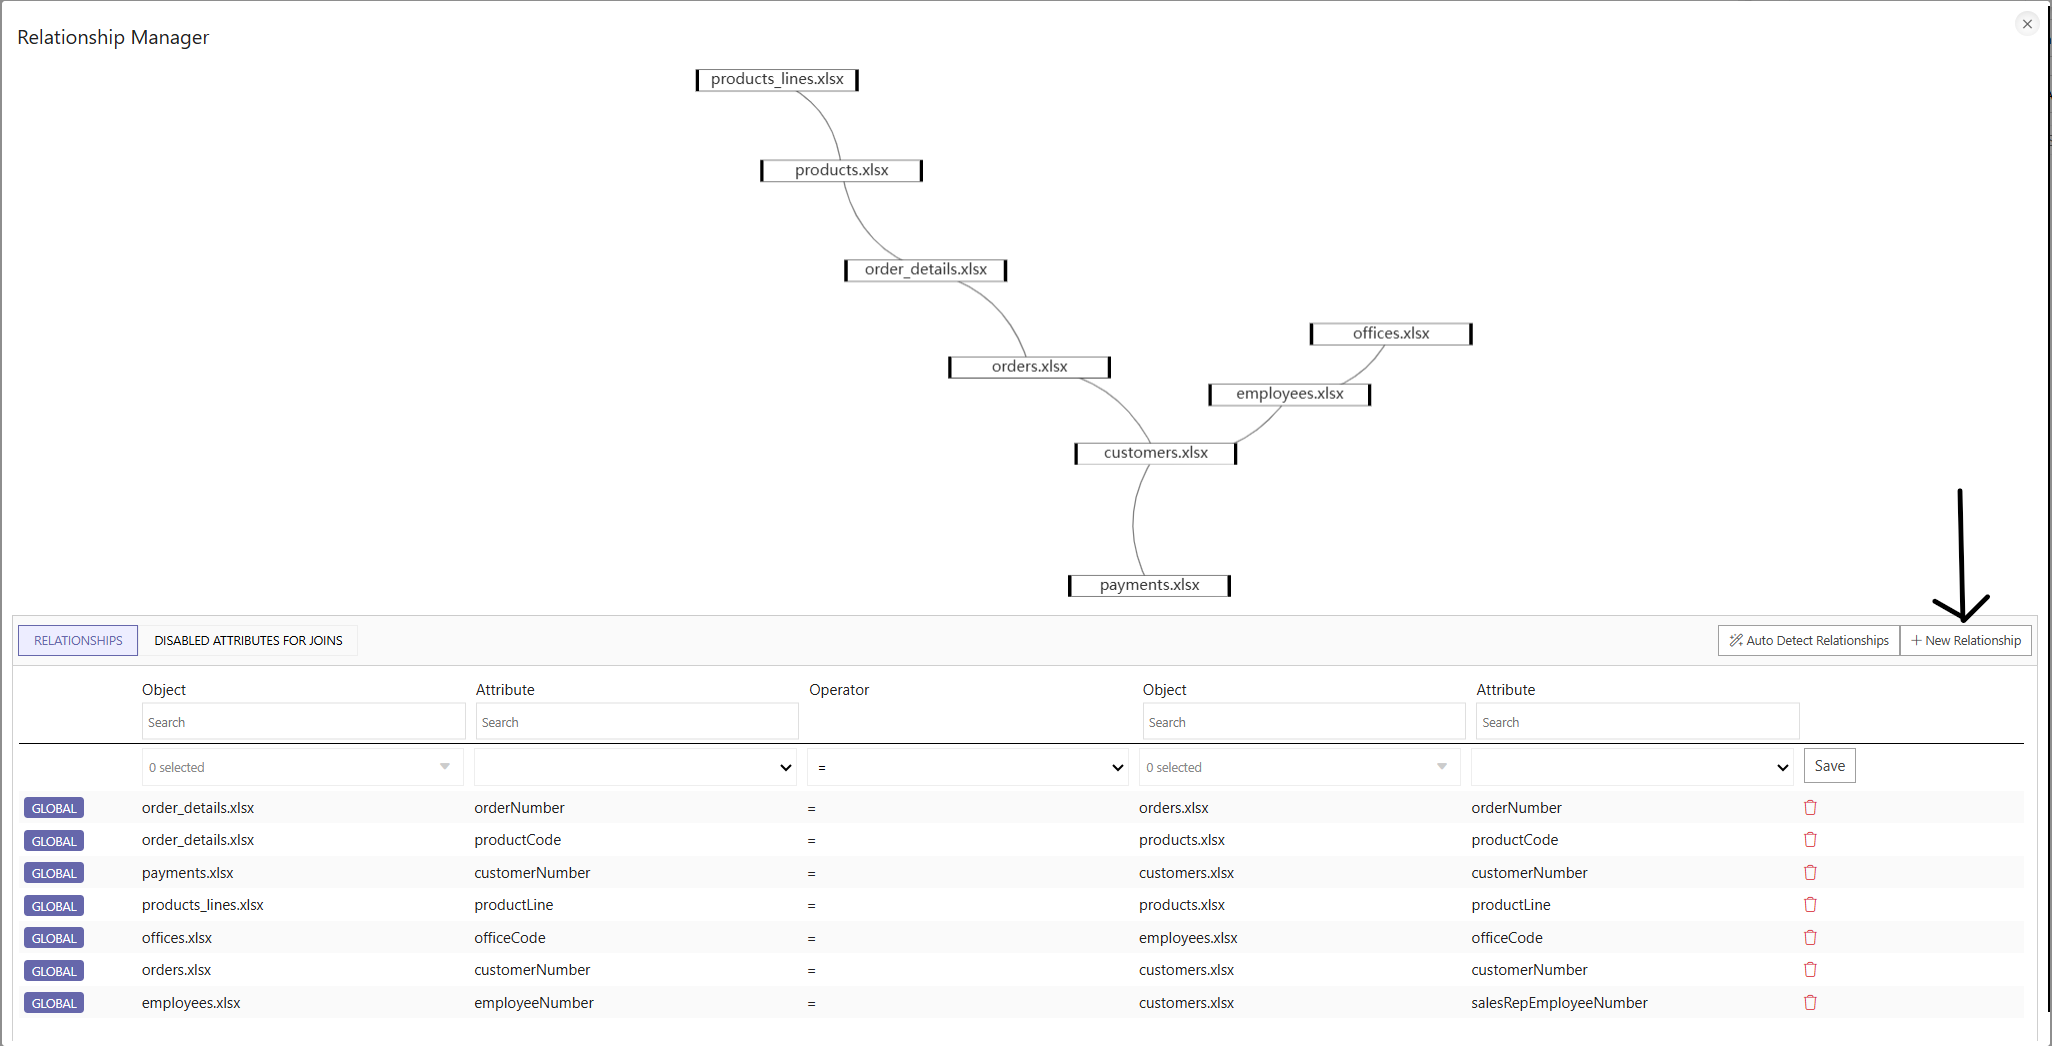
Once you click + New Relationship, an empty row appears in the relationships table. In that row, describe how the two tables relate:
- Object 1 — select the first object (for example
orders.xlsx) - Attribute 1 — choose the field from Object 1 (for example
customerNumber) - Object 2 — select the second object (for example
customers.xlsx) - Attribute 2 — choose the matching field from Object 2 (for example
customerNumber)
Click Save to confirm. Once saved, the relationship becomes active at the global level and is used across every tile and visualization built on this datasource.
Best Practices
- Always validate auto-detected relationships before building visuals on top of them.
- Avoid circular relationships unless you need them — PersivX can handle them, but they tend to confuse other users.